Reverse-Lens Macro Photography (Part I)
Transforming Ordinary Prime Lenses into Super-Macros
This is Part 1 of a 3-part series on “beyond 1:1” macro photography. As such, this article is best read from a full-sized PC or Mac, or maybe a laptop (when you have some time to concentrate and can really read the material), which is more difficult to do on a cell phone. With that said, this article describes one of many ways to shoot beyond 1:1 macro of living subjects. (There are better methods of shooting “dead” arthropods, propped-up and posed, but this article deals with shooting live subjects, beyond 1:1 magnification, in the field.)

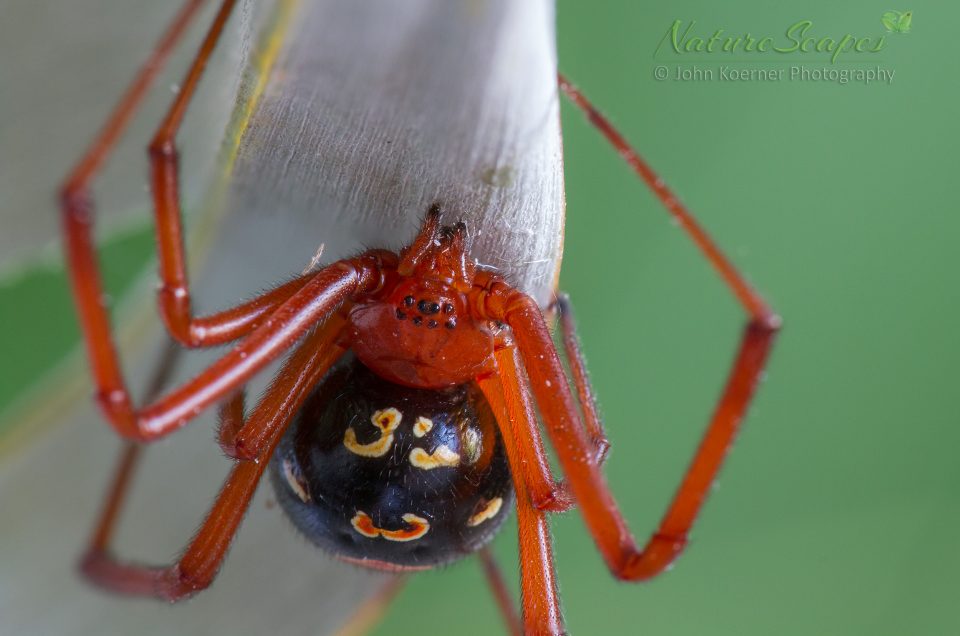
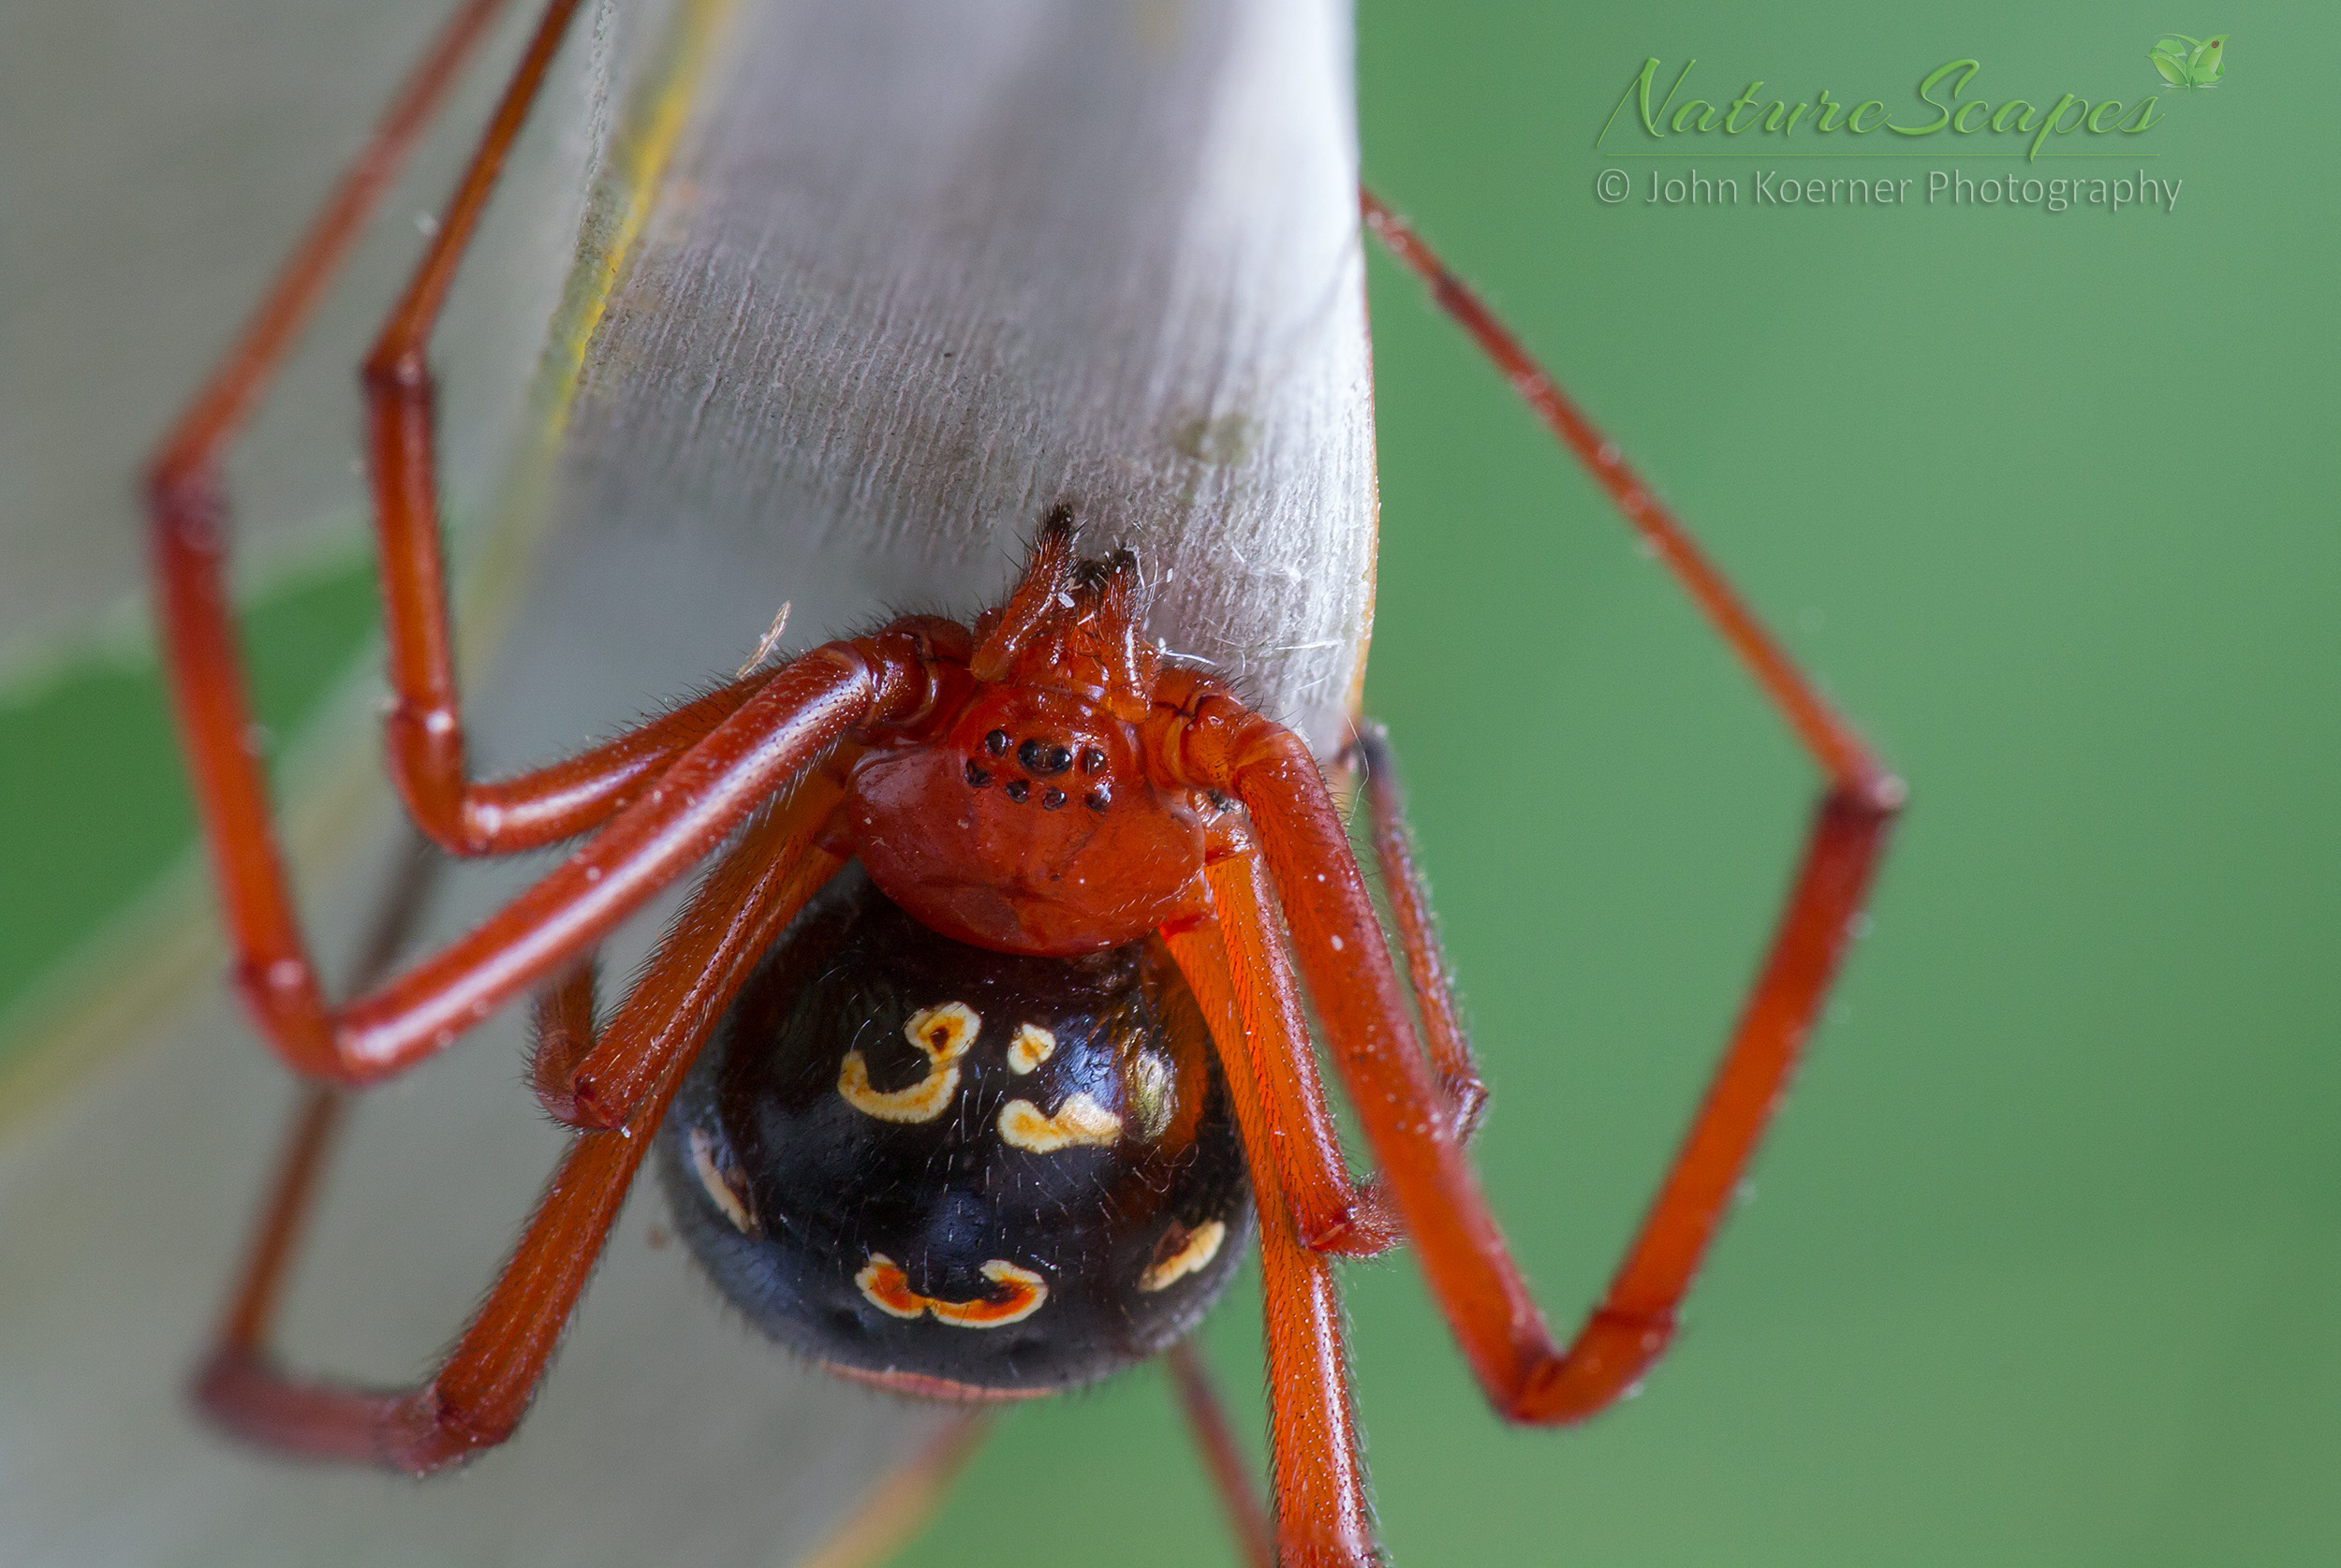
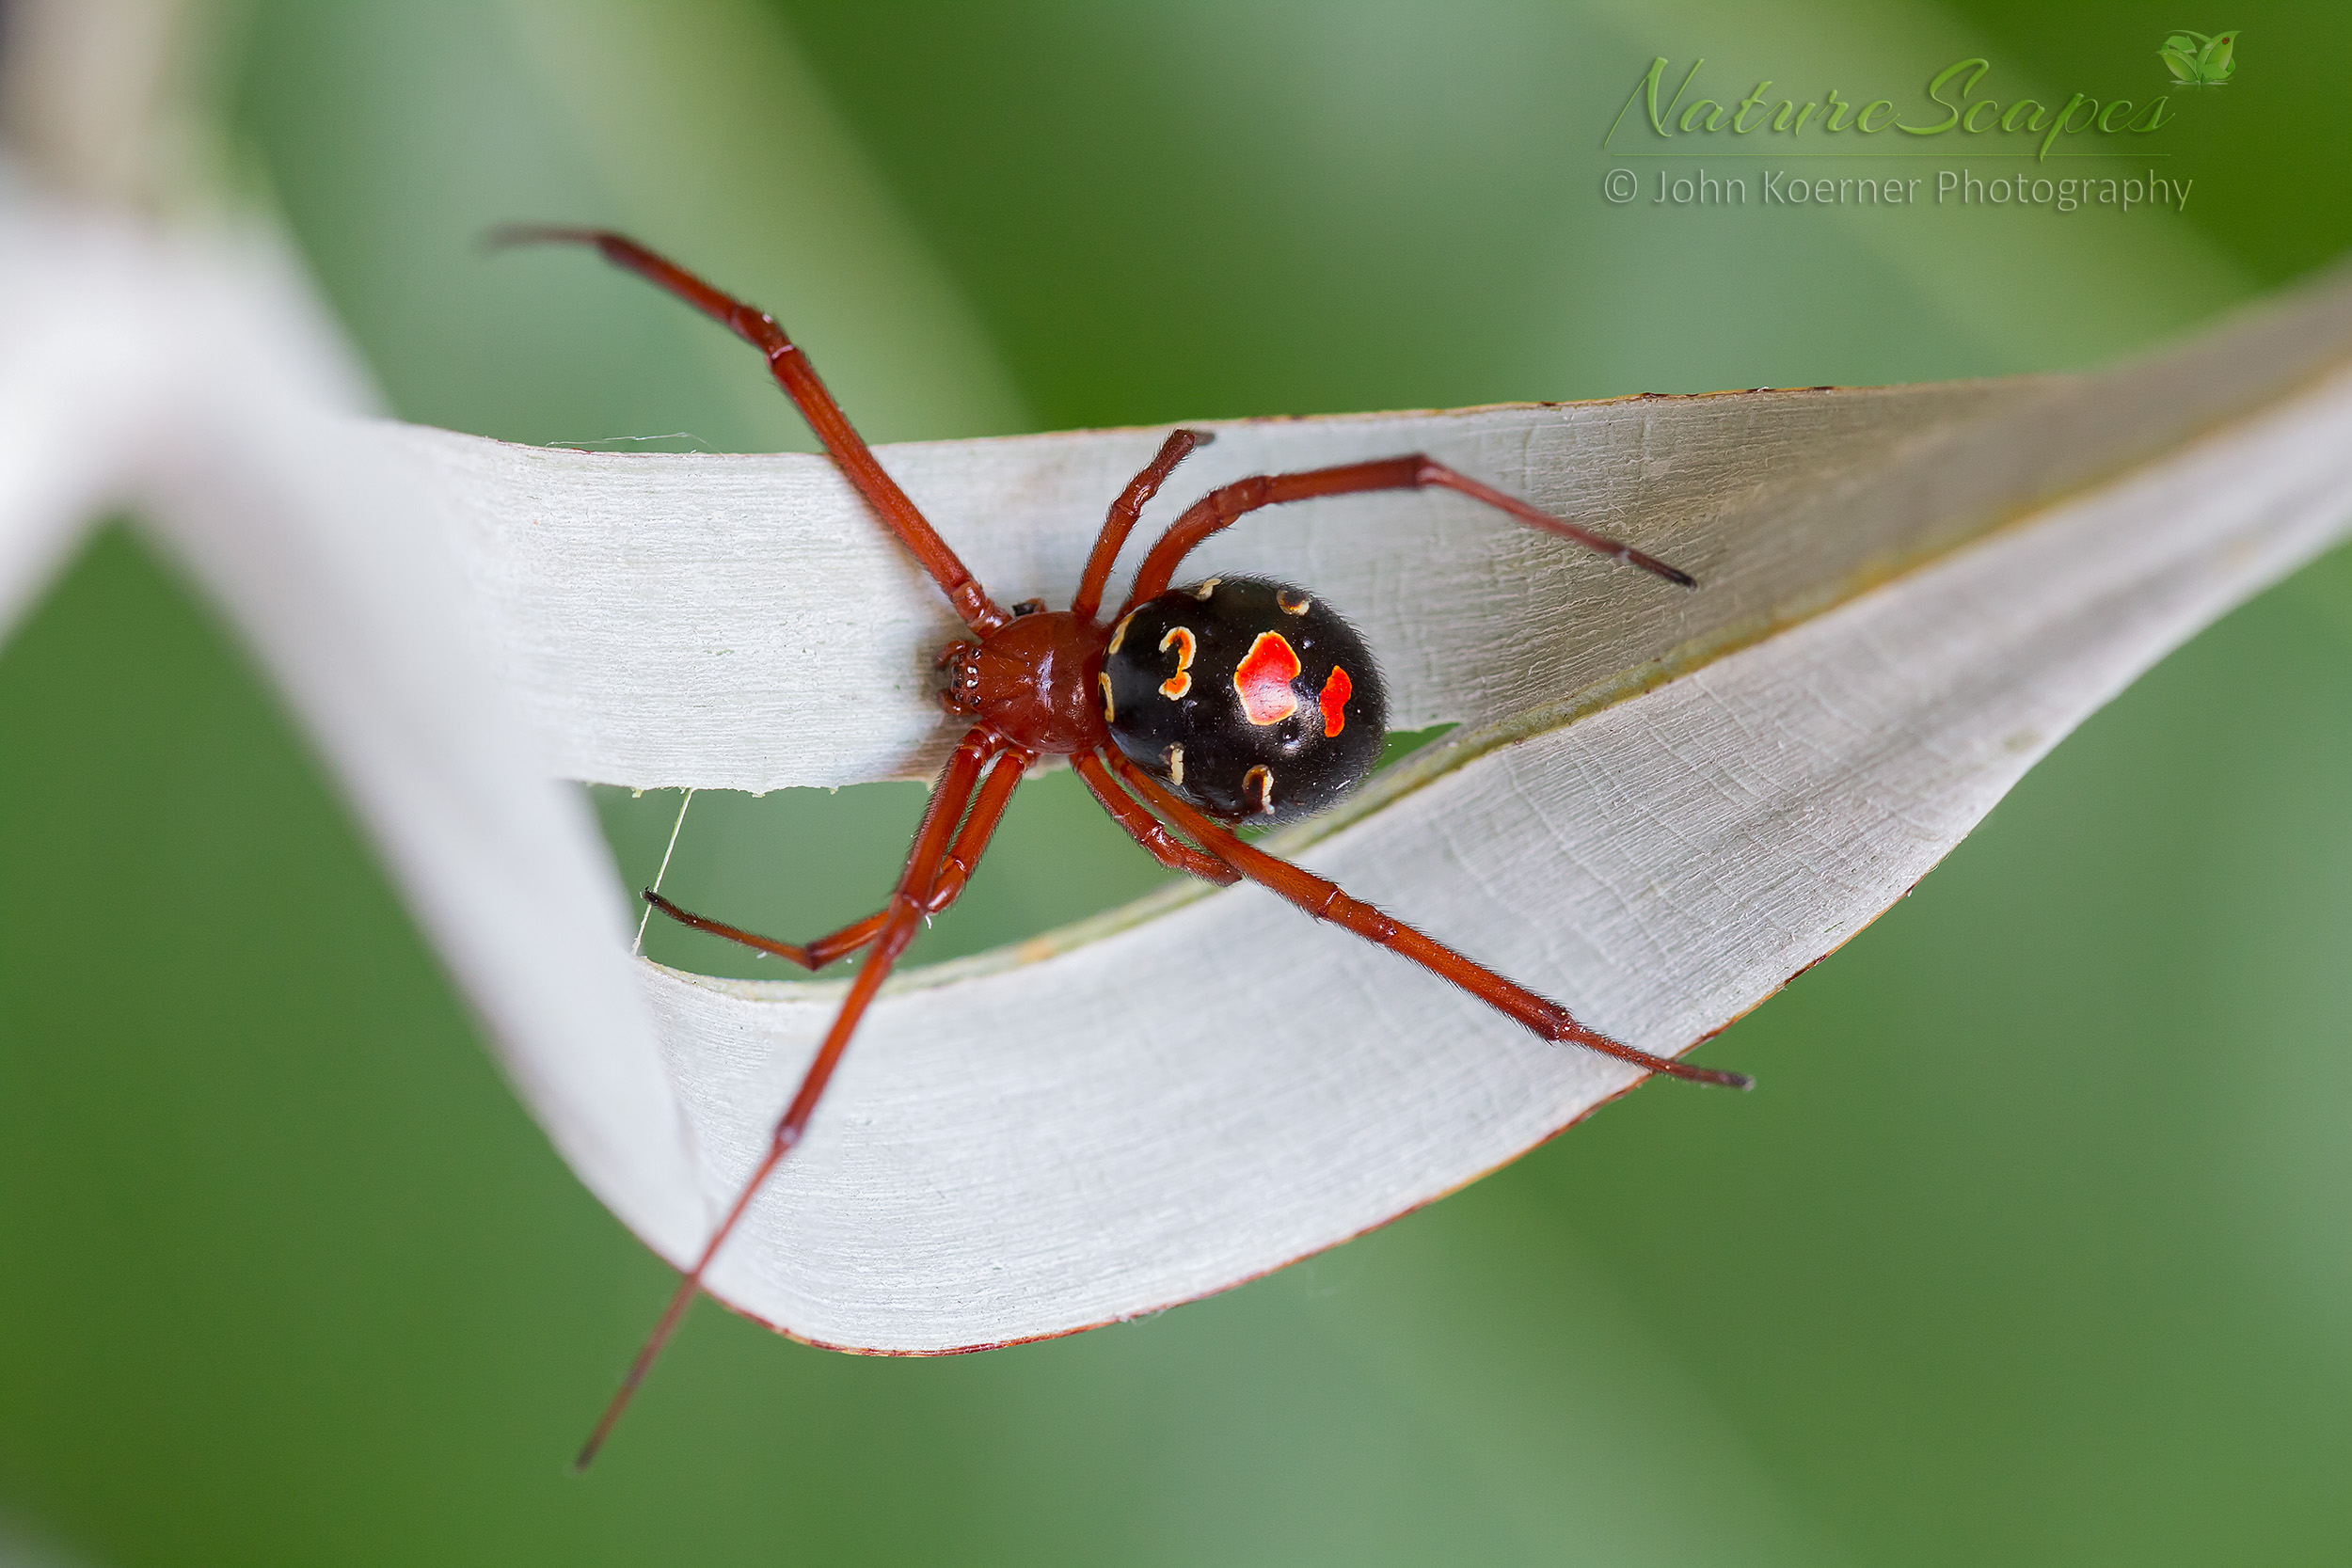
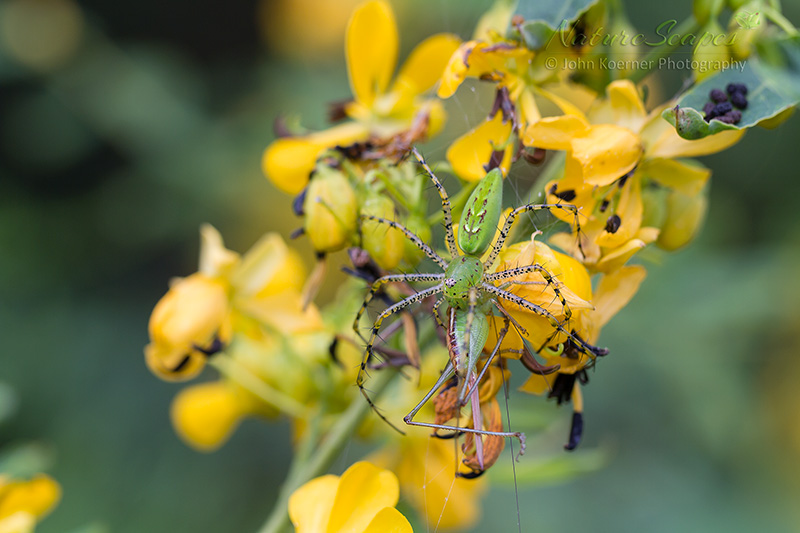
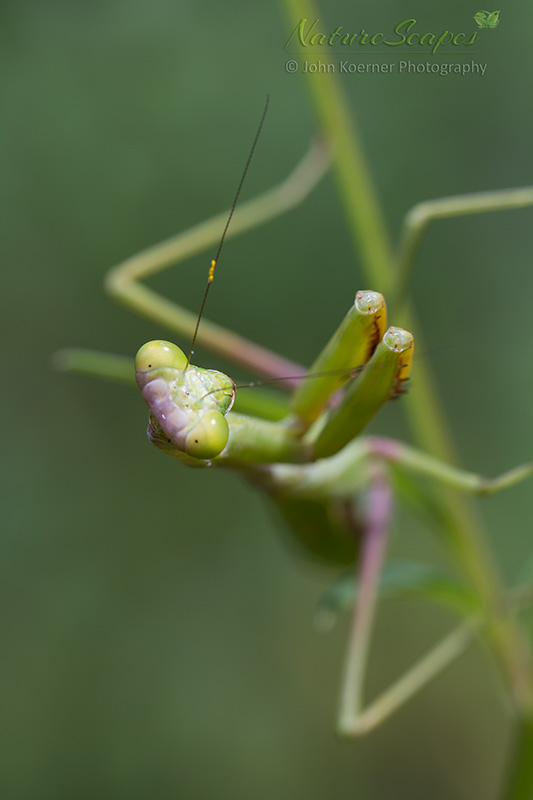
This image is nearly 4x closer than what a standard Macro lens can deliver.
To begin, shooting “1:1 macro photography” means the image reproduction ratio produced, relative to the sensor, is 1x lifesize magnification at the lens’ closest focus distance. In other words, if you have a 9mm subject, and are shooting 1:1 (or 1x lifesize), then all 9mm of that subject will take up exactly 9mm of your sensor. Compositionally, if you are utilizing a full-frame (36mm) camera, then the 9mm subject will take-up 25% of the frame. However, if you’re shooting a Micro Four Thirds camera (with a 17.3mm sensor), then that same 9mm subject shot at 1:1 will take up more than 50% the frame, compositionally. Your sensor-size is therefore an important consideration as to what “1:1” actually means to your photography, because while (technically) 1:1 always means “1:1 reproduction ratio,” compositionally a 1:1 lens can mean very different things when shooting across different platforms. (More on this below.)
Rubbing your chin on this fact, the reader will note that almost all commercial macro lenses are advertised as 1:1 macro lenses. However, some macro lenses only offer a 1:2 reproduction ratio … this means a 9mm subject will be reproduced as 4.5mm across a 36mm sensor. This is called “half life-size” magnification, but it is still a greater reproduction ratio than standard lenses offer. (I.e., standard lenses typically only offer 1:6 to 1:10 maximum reproduction ratios at their closest focusing distance.) In other words, a 90mm subect will be reduced to 9mm on your sensor (at 1:10) or to 15mm (at 1:6). Thus most lenses shrink the subject to fit the sensor even at their closest-focusing distances.
By allowing a 1:1 reproduction ratio, true macro lenses enable photographers reproduce tiny subjects 6-10x closer than standard lenses, creating a straight 1:1 ratio of a 36mm of subject being represented across the entire 36mm sensor, thus enabling the macro shooter to reveal subtle details of tiny subjects far beyond what ordinary lenses can do. Although this ability sounds like a photographic Nirvana, the trouble is, as wonderful as 1:1 (and even 1:2, half-life-size) macro lenses are, there are many interesting subjects that are much smaller than 36mm in size. This means, in order to adequately photograph such tiny subjects in detail, we need a lens that enlarges tiny subjects to “fill the frame” of a 36mm sensor.
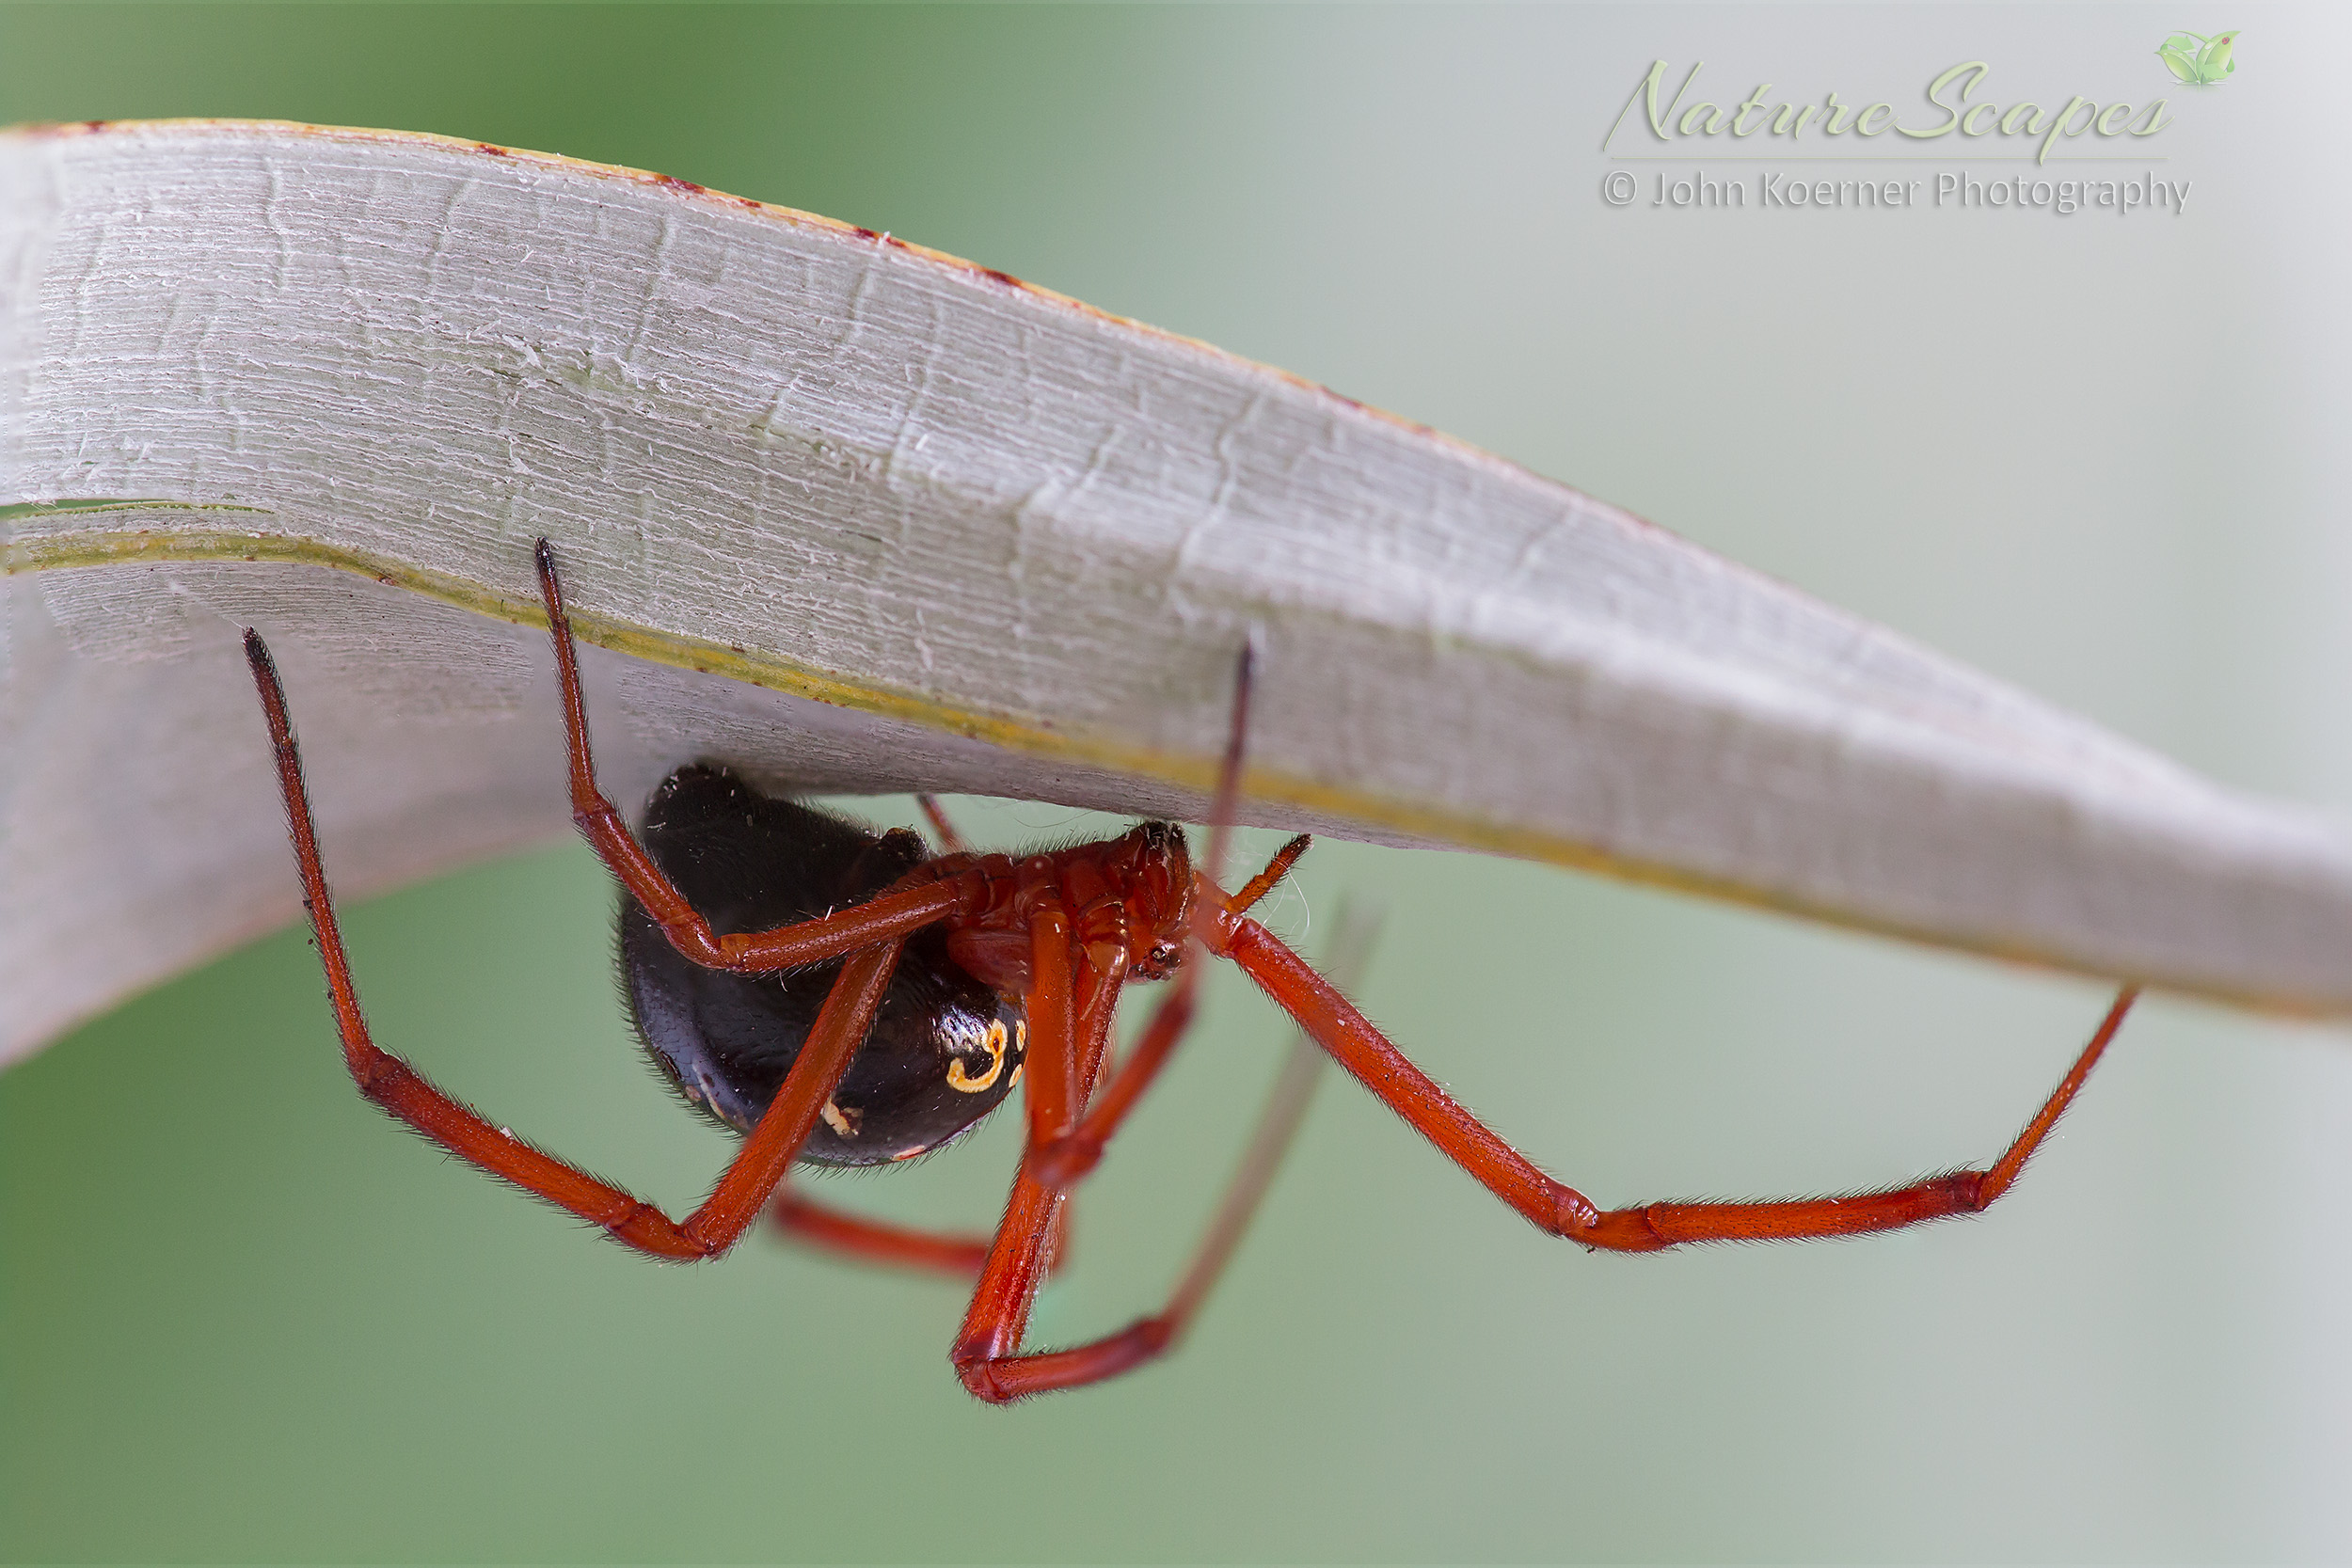
For example, the crab spider up at the top of this page only has a 4mm body and a 7mm total leg span. She would fit completely on your pinky-fingernail. Her full legspan is ~1/5th the size of a 36mm sensor. She is far too small to capture, in this much detail, using even a standard 1:1 macro lens. So the question thus becomes, “How do we ‘fill the frame’ like this using standard macro equipment?” The simple answer is, you can’t. To get as close as I could to her full 7mm legspan, and leave just a little extra space around her legs (~1mm on each side), I needed to enlarge approximately 9mm of subject onto a 36mm sensor. Remember, the best a standard macro lens could do would be to reproduce 36mm of subject onto a 36mm sensor (or get ¼ this close), and I would have lost critical detail trying to ‘crop’ the image at that low of a magnification. Therefore, in order to get as much detail as I did, and truly “fill the frame,” with no crop, I had to go in 4:1, four-times as close as a standard macro allows. I had to ‘fill a 36mm sensor’ with 9mm of subject (to give a little room around the spider’s 7mm legspan). The tools and techniques required to go about this brings us to the topic of this blog entry: high-mag macro photography through reverse-mounting prime lenses.
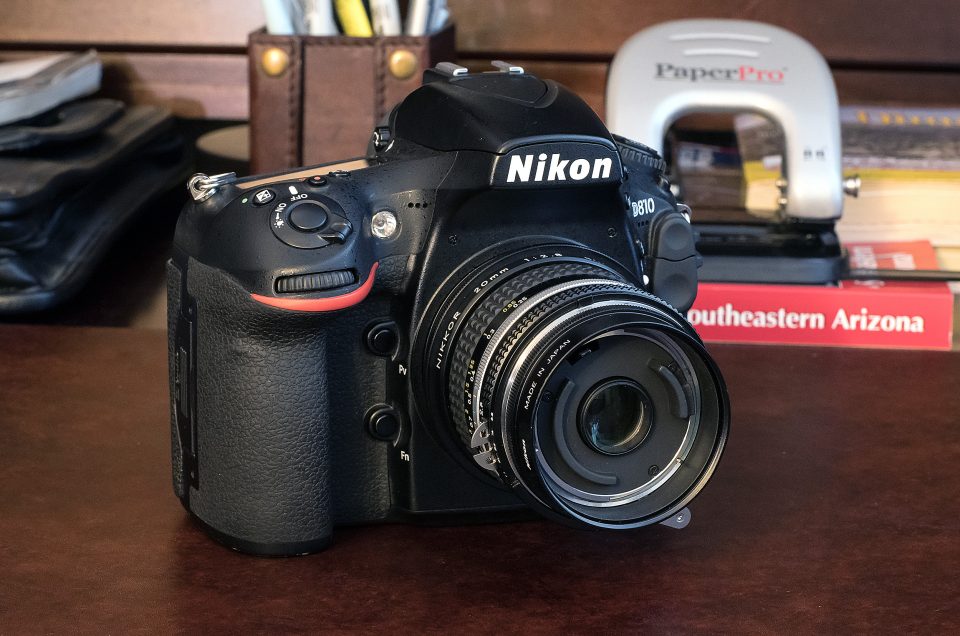
Reverse-lens macro photography is the act of taking a standard prime (or zoom) lens, and reversing it, connecting the filter threads of the front element to the camera (via an adapter) and leaving the rear element protruding outward toward the subject (note the main camera photo up top). The goal in doing this is to achieve extreme magnification, inversely-proportional to the width (focal length) of the lens. That is, the wider the lens is, properly-oriented, then the closer it focuses, when reversed. And this just makes sense. A wide lens properly-oriented takes a great deal of landscape, and condenses all of it on a tiny camera sensor; but if you reverse the wide lens, it now takes a tiny subject and magnifies it greatly on your sensor! Thus there are particular focal lengths that can serve dual roles in your camera bag. Note: 50mm lenses are “the starting point” for lens-reversal, as they allow us to achieve just beyond 1:1 magnification. Since most commercial macro lenses already do this, it only makes sense to be begin with 50mm lenses, and go progressively wider, the more-and-more magnification you seek. For example:
- A 50mm lens reverses to ~ 1.1x magnification
- A 28mm lens reverses to ~ 2.1x magnification
- A 20mm lens reverses to ~3.4x magnification
Why are focal lengths between 20mm and 50mm ideal? Well, reversing lenses with greater reach than 50mm is pointless, because they give you less than 1:1 magnification when you reverse them, which you can accomplish with any standard macro. Meanwhile lenses wider than 20mm typically have front glass elements too big for reversing, as the diameter of the front glass is almost invariably wider than the diameter of the adapter needed to thread them. Thus lenses between 20mm and 50mm are the ideal candidates for reversing.
Understanding Magnification
This brings us to the subject of magnification, and trying to visualize what degree of magnification we seek. Before we proceed, keep in mind this article is being written with respect to a full-frame sensor size (36 x 24 mm). If you have a sensor-size different from this , then while technically the magnification values won’t vary—compositionally, they very much will, again based on your particular sensor-size. As mentioned above, with a full-frame sensor, when we speak of 1:1 (or 1x) magnification, what this means is when we use a standard 1:1 macro lens, at its closest-focusing distance, we will “fill our (36 x 24 mm) frame” with a 36mm subject. If we’re only at 1:2 (half-lifesize, or .5x) magnification, then we can capture a 72 mm subject across our 36 mm sensor at the lens’ closest-focusing distance. If we’re only at 1/4 lifesize (or .25x) magnification, then at best we can “fill our (36mm) frame with a 144 mm subject. The 36mm sensor is going to be our reference point, so when I say a crop-camera (APS-C or DX) has 5.2x “effective magnification,” I realize that this may not be technically accurate, but it provides a visual regarding SENSOR COVERAGE and “filling the frame.” It’s the same thing with telephoto lenses. A 300mm lens is a 300mm lens, but on a DX (APS-C) camera, with a 1.5x magnification factor, that same 300mm lens has an “effective focal length” of 450mm, again due to the sensor coverage. Well, this same truth applies with macro magnifications. Make sense? Good.
When we start moving closer-in on subjects, when we add such factors, like using a “crop” (APS-C) camera—or even a micro 4/3rd camera—we are changing “how much frame” we have (or need) to fill with our subject. We need to consider how these things affect what we’re doing before we select which lens to reverse. In other words, a 26mm lens may reverse to become a 2.1x macro on a FF … but it will have a greater than 3.2x “effective magnification” (sensor coverage) on a DX. [FYI, Nikon “crop” sensors are 23.6 x 15.7mm (giving a 1.5x multiplier), while Canon APS-C sensors are 22.2 x 14.8mm (giving a 1.6x multiplier)]. Since I shoot Nikon, I will deal with these differences, but you can use these same principles to figure out your own unique framing based on your own unique sensor size in comparison to the 36mm Standard. In other words:
Full-Frame vs. Crop (APS-C) Sensors

Full-Frame sensors have more than twice the surface area of APS-C sensors and 4x the surface area of Micro-4/3rd sensors.
I realize this is all confusing, so let’s get back to basics. Remember, a lens that gives us 1:1 reproduction on a full-frame sensor, translates to 36 x 24mm of coverage. By contrast, when we use a “super” macro lens, rather than moving away (to half-size), we are now moving-in passed the standard 1:1 macro reproduction rate, to achieve a 2:1 (or 2x lifesize) magnification level, or greater. At 2:1 (or 2x) magnification, this means we are “filling the 36mm frame” with a mere 18 mm subject. If we move in even closer and go to 4:1 (or 4x lifesize) magnification, now we are filling our 36mm frame with a 9mm subject, such as the tiny crab spider female up top. But these measurements all change if we’re using a crop camera—they get even closer! For this reason, “crop” (APS-C) cameras, with smaller (24 x 16mm) sensors, are often preferred for macro photography … because they offer a 1.5x equivalent magnification factor. In other words, a 1:1 lens offers 36mm of complete sensor coverage on a full-frame camera, yet that same 1:1 lens fills a ~24mm sensor on an APS-C camera. 24mm is 1.5x closer than 36mm, so a 1:1 lens is “effectively” a 1.5x lens on an APS-C camera. Let’s see how this plays out on a table, namely how the same lens, reversed, magnifies on a full-frame camera vs. an APS-C:
Below is a table of the best prime Nikkor AI-S lenses that can be deployed to accomplish 1:1 to 5:1 macro photography, when reversed. This table is designed to show the differences in reproduction ratios between full frame (FX, 36mm) and APS-C (DX, 23.6mm) sensor sizes, using the same lens, to show which is the most useful within the 1x to 5x magnification parameter:
Thinking in Terms of Millimeters (mm) and Sensor Coverage
(Nikkor AI-S Lenses) | (on Full Frame - FX) | (on APS-C - DX) |
|---|---|---|
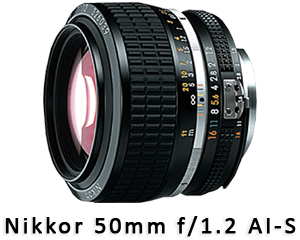
| A 50mm f/1.2 AI-S lens reverses to: | 1.1x ( = 32.7mm edge-to-edge coverage) | 1.7x ( = 21.5mm edge-to-edge coverage) |
| A 35mm f/1.4 AI-S lens reverses to: | 1.8x ( = 20.0mm edge-to-edge coverage) | 2.8x ( = 13.1mm edge-to-edge coverage) |
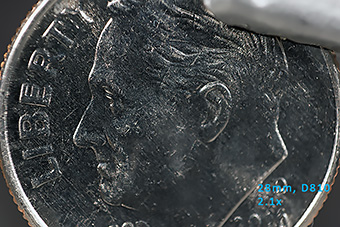
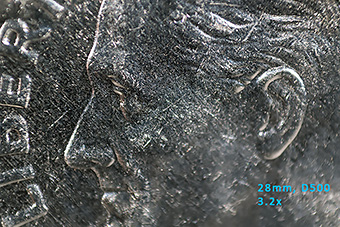
| A 28mm f/2.8 AI-S lens reverses to: | 2.1x ( = 17.1mm edge-to-edge coverage) | 3.2x ( = 11.2mm edge-to-edge coverage) |
| A 24mm f/12.8 AI-S lens reverses to: | 2.6x ( = 13.9mm edge-to-edge coverage) | 4.0x ( = 9.1mm edge-to-edge coverage) |
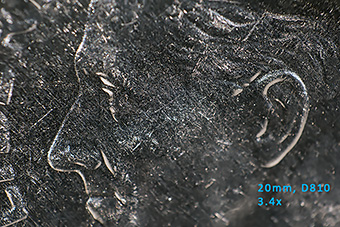
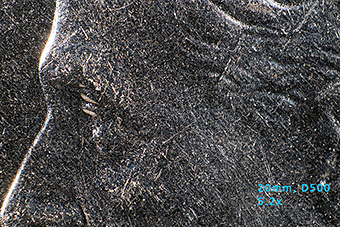
| A 20mm f/2.8 AI-S lens reverses to: | 3.4x ( = 10.6mm edge-to-edge coverage) | 5.2x ( = 6.9mm edge-to-edge coverage) |
With this paradigm in mind, based on the sensor size we’re using, when we decide what magnification (or reproduction ratio) we want to achieve, we need to take the size of our subject into consideration, as well as the size of our sensor, and thus determine what is the optimal combination of lens-to-camera we need in order to “fill our frame,” compositionally. Because numbers and charts are often confusing, here is a visual of the difference reverse-mounting key prime lenses can make, on FF vs. APS-C cameras, compared to a standard 1:1 (1x) macro lens:
Lens Magnification Visual Comparison
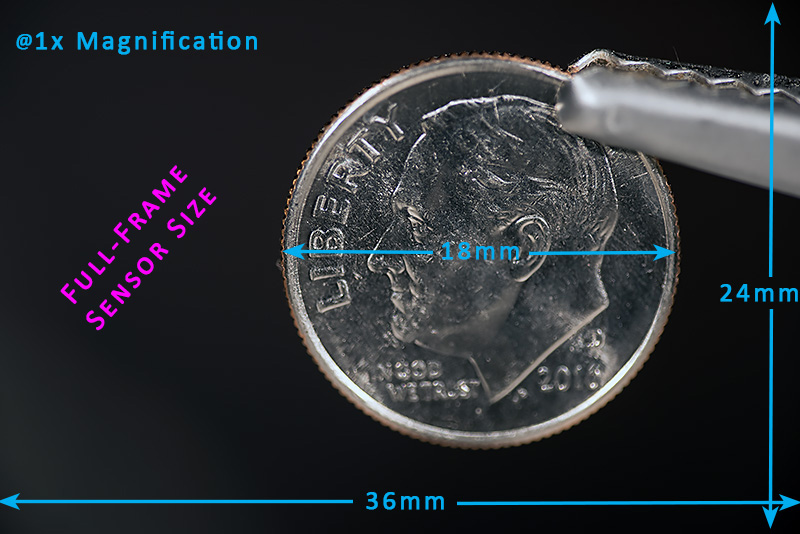
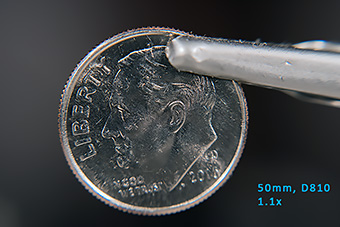
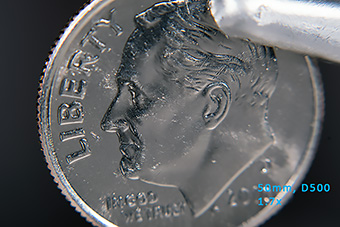
This is as close as you can get to a dime w/ a standard macro lens @ 1x on a 36 x 24mm sensor.
For me, since I carry two cameras (FX and DX), I use only these 3 AI-S lenses. which can get me from 1.1x magnification ... all the way up to ~5.2x "effective magnification" ... based on which lens I decide to put on what camera, reversed.
How Close Should You Go?
So how do we translate this? Well, since we’re all familiar with the size of a dime (18mm, edge-to-edge, or 2:1), I thought this would be a helpful visual to consider in relation to the size of your subject. If your macro subject is approximately 30mm at its widest point, it is almost twice the size of a dime, so it’s too big for a super-macro lens. Therefore, just use a regular macro lens. However, what if your subject is ~15mm at its widest point? For example, an adult Phiddipus jumping spider would completely fit on top of a dime, with a bit room to spare, but not too much. Knowing this, we can select a reverse-lens option from 1.5x to 2x, and have enough space around the subject to see the environment. So here is what I did:
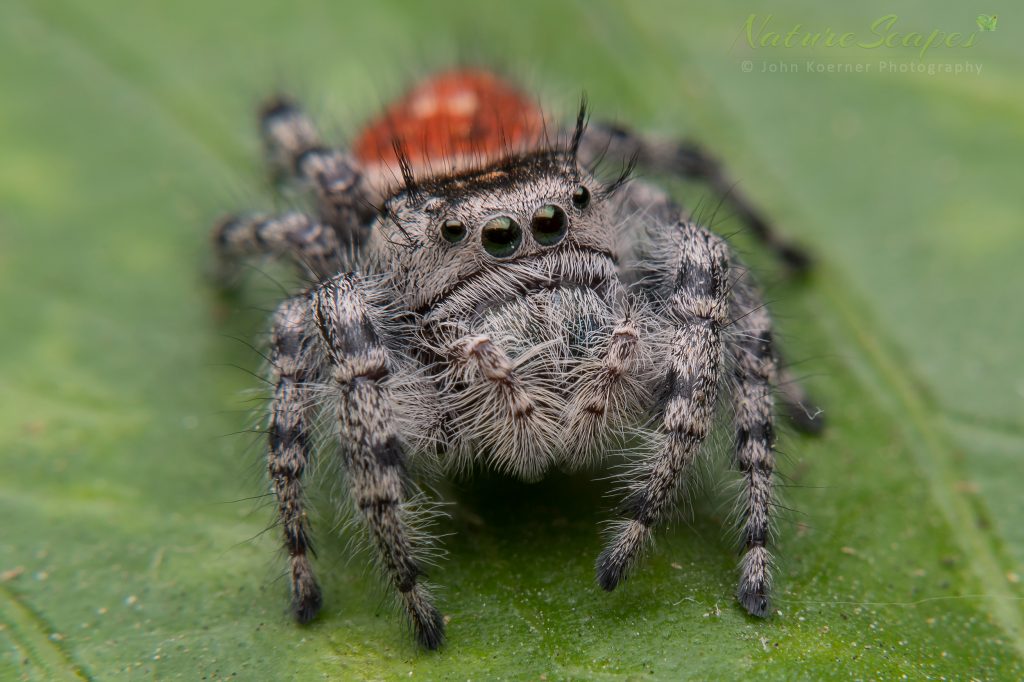
This jumping spider (15mm) is approximately the size of a dime (18mm). To get her (and part of her environment) in the shot, I chose 1.7x (22mm) of magnification.
I personally like a little room around my subject, so to photograph the spider I used a 50mm lens, reversed, on a D500. Reviewing the “Thinking in Terms of Millimeters” Table, two tables previous, this gave me an effective 1.7x magnification, with the crop-factor of the D500 (or 21.5mm to ‘fill the frame’). I could just as easily have used a reversed 24mm lens on a D810 (1.8x FF, which would give me 20mm), or possibly even a reversed 28mm lens on the D810 (2.1x FF, or 17.1mm edge-to-edge, although that might have been too close for my taste). The important point is to determine whether we’re using a 36mm sensor, or a 24mm sensor, or even micro-four-thirds sensor, in order to make the best selection based on our sensor measurement, balanced-against the size of our subject, factored by the reproduction ratio of our lens (reversed). This is the ultimate way to come to terms with the optimal degree of magnification for our purpose.
To accomplish this perspective, in relation to your subject, it is helpful to visualize a metric ruler:
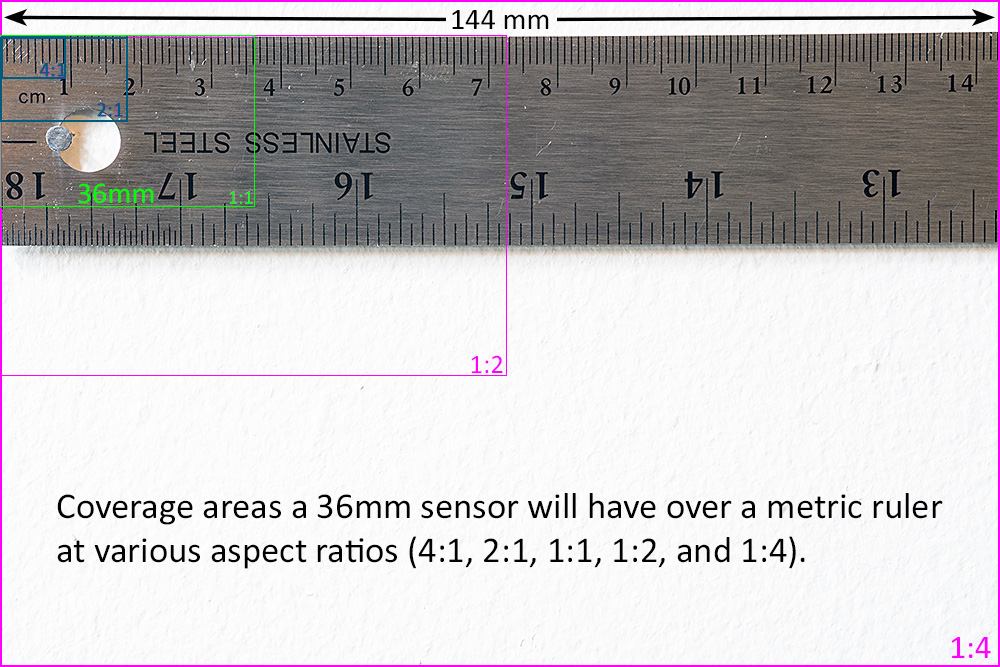
Not quite to scale.
The ruler above is as close to scale as I could get, given the variables of different viewers’ screen sizes, and it covers the effective “field ranges” live macro photography involves: 1:4 (¼x) all the way to 4:1 (4x) lifesize magnification. Translated to mm, this means 144mm (1:4) all the way down to 9mm (4:1). The if we consider that the size of a dime (18mm) is where 2x magnification begins, we begin to develop a sense for where a standard 1:1 macro lens will help us—as well as when we need a “super-macro” lens. Essentially, a standard macro lens will allow us to “fill the frame” with any subject that fits within the green 36mm frame on the ruler, or bigger. This tiny area will comfortably-fit a variety of small subjects (e.g., small butterflies, many beetles, wasps, larger bees, etc.). However, some macro subjects will be too large to fit within the green 36mm sensor-size (larger butterflies, praying mantids, grasshoppers, snails, etc.). Therefore, for these larger subjects, backing-off to 1:2 or even 1:4 magnification will be necessary in order to reduce the actual size of the subject onto our 36mm frame. All of this can be accomplished with a standard macro lens.
However, sometimes we are faced with the opposite situation: we need to move in closer, passed 1:1, in order to achieve 2:1 or even 4:1 magnification—or beyond (look at ruler to see the difference). There are many small arthropods (spiders, flies, ants, aphids, even tiny flowers), for which a standard 1:1 macro magnification is simply going to be inadequate to “fill the frame” with these diminutive subjects. As the tables above show, reducing your sensor size, by selecting cameras with APS-C (or smaller) sensors can “fill the frame” with “equivalent amplifications” in magnification. Regardless, in order to move beyond the limitations of standard macro lenses, implementing reversing-rings allows you to invert wide-prime lenses, which thereby enables you to achieve magnification levels not possible with standard macro lenses. However, there are some limitations here too (to be discussed below).
With this visual in mind, above, now let us see how we can reverse lenses to go the opposite route, to get closer than 1:1, when our subjects are much smaller than a 36mm sensor. Take, for instance, a common Green Bottle Fly (Lucilia sericata), below, which is only about 6-9mm in length. How can we capture an image of this fly adequately, on a 36mm sensor, when my sensor is 4-6x bigger than the subject? The answer is we have to get closer! Using the ruler above, we can see that a 3:1 reproduction ratio will enable us to fit 12mm of subject onto our sensor. This will take the whole 9mm subject in and allow some room to see a bit of background:
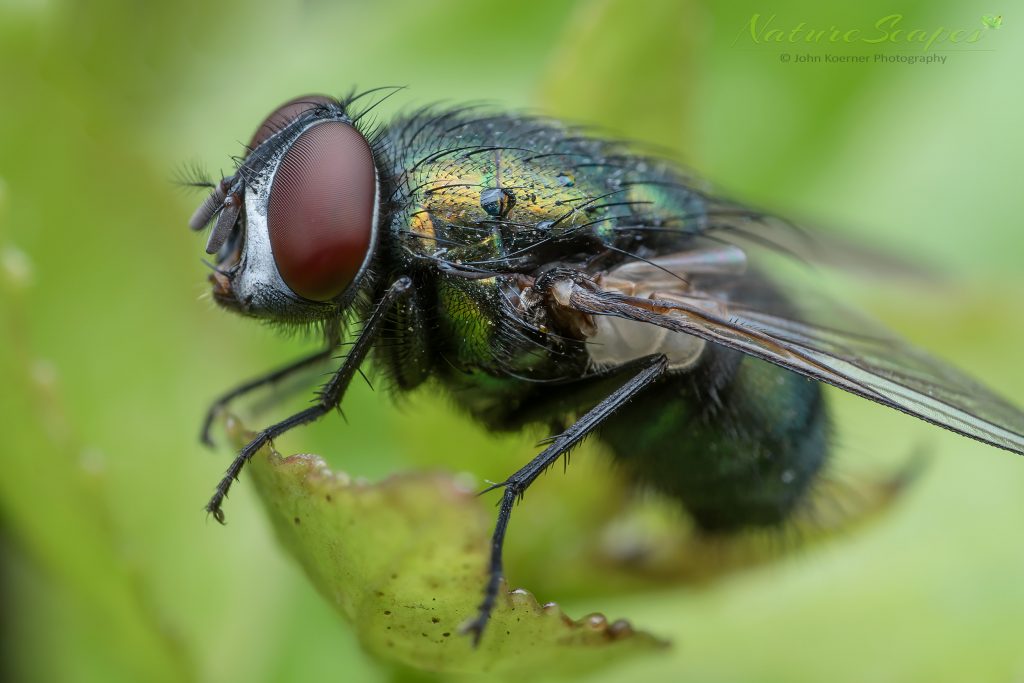
This Green Bottle Fly is about 9mm … so I shot it at 3:1 (12mm), to give it some space, using a 28mm AI-S lens reversed on my D500.
Now that we’ve touched on the subject of considering the different magnifications needed, to go beyond 1:1, let me address the subject of magnifications beyond 5:1 magnification (7.2mm reproduced to fill a 36mm sensor). Photographing subjects at extreme magnifications is going to require microscope optics and can’t be done in the field. This type of endeavor is no longer “macro photography” but photo-microscopy, which is beyond the subject of this article. This article deals with high-mag macro from a 1:1 to a 5:1 reproduction ratio. That said, let’s get a visual of what manual-focus lenses we need to accomplish this. Again, I happen to use Nikon, but these principles apply to any camera system. In fact, since we’re reversing, it doesn’t matter ‘what brand’ you shoot, since the mount is no longer at issue.
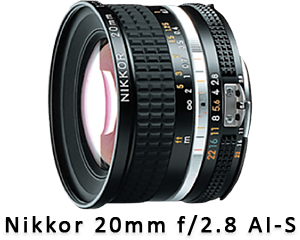
Nikkor AI-S Lenses
Depending on your budget, you’re most likely going to want to avoid Nikon’s budget glass (the older Series E glass), and go with their better AI-S glass. Mind you, if you shop Ebay, the difference in price between the two isn’t much, so it just makes sense to go for the better of the two classes of optics. Therefore, take your time and look for the best options:

Series E lenses are budget lenses not good enough to be called “Nikkor.” Try to look for NIKKOR AI-S Lenses.
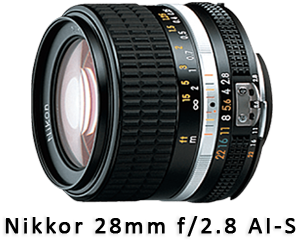
Nikkor AI-S manual lenses are Nikon’s best MF glass. Try to avoid Series E lenses, as they are not of the same quality craftsmanship. To distinguish between the two, note that the Nikkor AI-S primes will always have The Ear on them (refer to green arrow above), as well as the word, “NIKKOR,” on the front element (green circle), both of which the Series E “all plastic” lenses lack. One more thing: many people ask me, “Why use manual-focus lenses? Why not use auto-focus glass?” First, manual focus lenses are tougher, less-complicated, and are optically as good as (or, in many cases, better than) most AF lenses. Second, you lose all aperture control when you reverse-mount an AF lens … the electrical mount contacts are pointing the other way … whereas you can still control the manual aperture on Nikkor AI-S lenses, even when they’re reversed. With that said, let’s jump right in and get a visual on implementing the simple rings/adapters required to convert Nikkor AI-S lenses into “super-macro” tools:
Moving from 1:1 to 2:1+ with the Nikkor 28m f/2.8 AI-S:
Now that we’ve discussed the concepts and magnifications, let’s get into the material components necessary (1) to reverse your AI-S lens onto your camera and (2) how to protect the exposed rear element—by creating a make-shift lens shade:
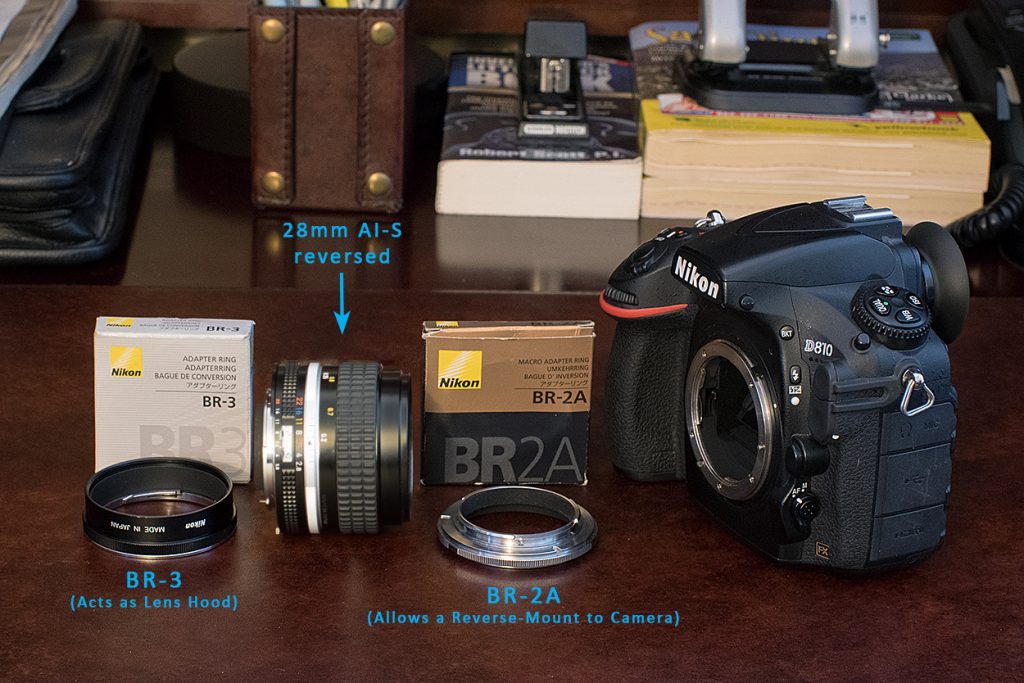
To reverse-mount a lens, you will need the Nikon BR-2A Adapter and the Nikon BR-3 Adapter.
There are basically two additional pieces you will need to go along with your AI-S lenses: the Nikon BR-2A adapter and the Nikon BR-3 adapter. One attaches to the front filter threads of your lens, allowing the reverse-mount, the other acts as a lens hood for the exposed rear element. [Keep in mind, while the 28mm reversed on a full-frame offers 2.1x magnification (17.1mm edge-to-edge coverage), when the same lens is reversed on an APS-C, it reaches a ~3.2x effective magnification (only 11.2mm of subject will fill a DX frame).] That said, once you connect the pieces together, you are now ready to take “super macro” images:
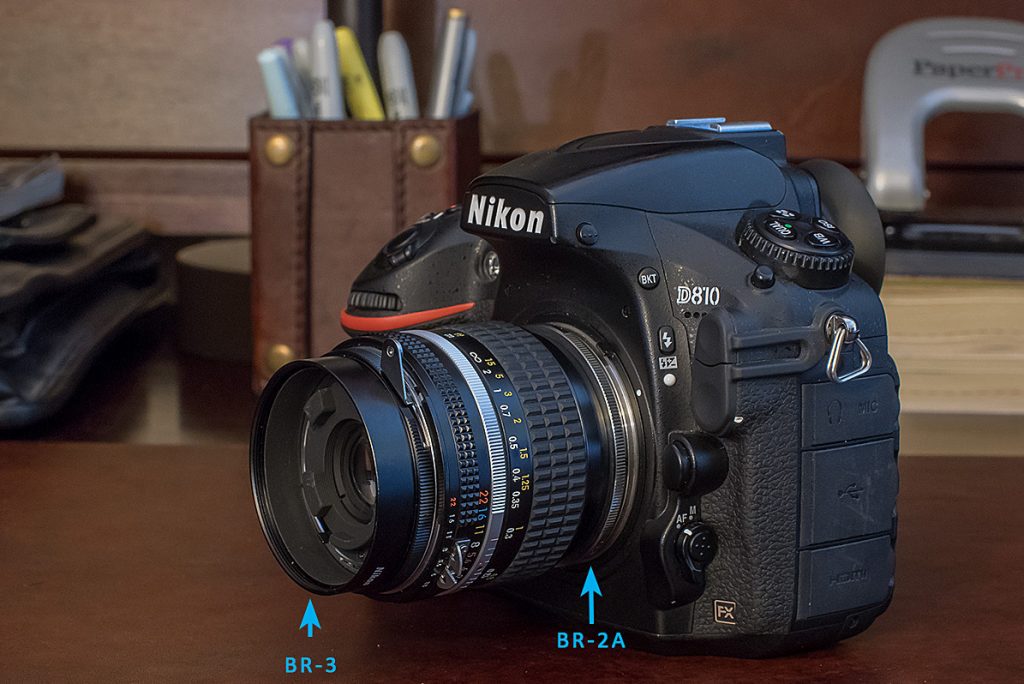
The Nikkor 28mm f/2.8 AI-S is now reversed and ready to take 2:1 macro shots, twice-as-close as what a standard macro lens can do.
Increasing to 3:1+ with the Nikkor 20m f/2.8 AI-S:
Keep in mind that Nikon’s standard front-filter size is 52mm. This is the dimension around which the BR-2A is based. The important lenses that you can reverse mostly have this dimension as well, including the 55mm f/2.8 Micro AI-S (1x), the 50mm f/1.2 AI-S (1.1x), the 35mm f/1.4 AI-S (1.8x), the 28mm f/2.8 AI-S (2.1x), and the 24mm f/2.8 AI-S (2.6x). However, if you want to get even closer, you will need to move to a Nikkor 20mm AI-S (3.4x), but this now needs an additional adapter: the BR-5:
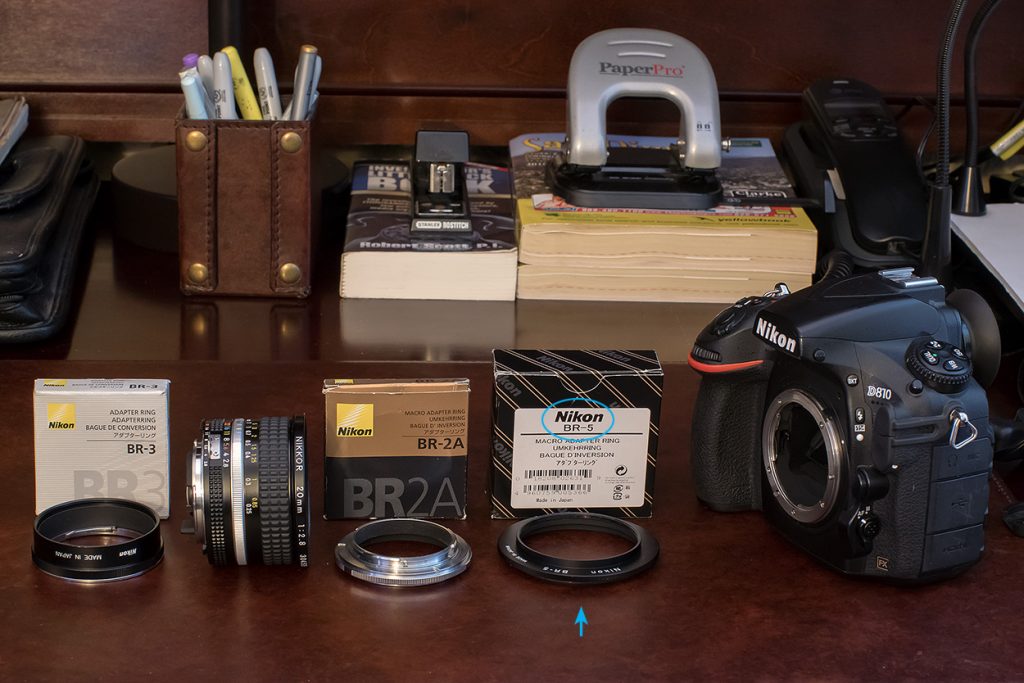
When reversing 20mm and beyond, you need to add the BR-5 Adapter.
The BR-5 allows you to thread the 62mm front filter of the 20mm AI-S lens to the BR-2A (52mm), which in turn then mounts onto your camera. However, like the BR-3, the BR-5 is discontinued, but you can still find it on Ebay. You can also purchase a Sensei-PRO 62-52mm Step-Down Ring, which does the same thing. Either way, it involves one extra ring assembly effort, and once assembled, your setup looks like this:
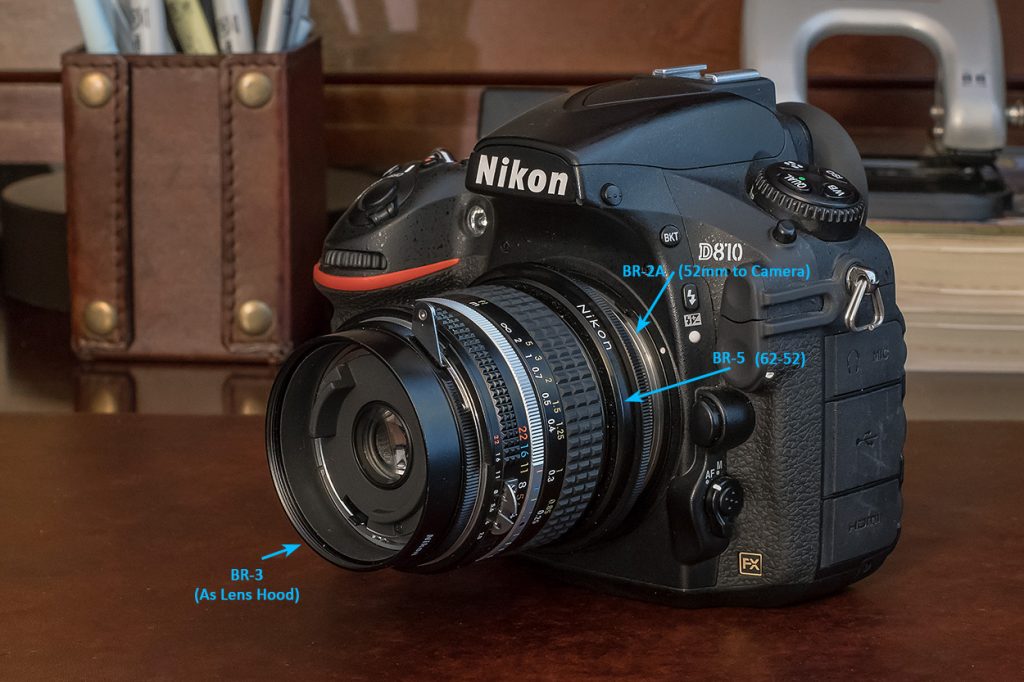
The BR-5 acts as a go-between via the 62mm front thread of the 20mm and the BR-2A. Now we’re ready to shoot 3.4x 🙂
As before, keep in mind, while the 20mm reversed on a full-frame offers 3.4x magnification (10.6mm edge-to-edge coverage), when the same lens is reversed on an APS-C, it reaches a ~5.2x effective magnification (only 6.9mm of subject will fill a DX frame).
So there you have it, the easiest and least-expensive way to shoot super-macro.
